Recently I went to Iwan Ries & Co. A well known pipe shop online and in reality. In the bustling surviving city of Chicago. Anyways When you first see Iwan Ries & Co. your immediate thought is, that it's pretty much like its website. Rundown, old, past its prime, and going out of business. Not to mention latest victim of the recession.
But that is far from the truth. When you enter you will climb up two flights of stairs and take a right. Where you'll enter the shop that felt like entering a speakeasy. Just without the booze and mobsters. Where, instead of a man waiting to take your coat, you are greeted by a case full of interesting pipes through different eras, including a Native American peace pipe.
As you enter the shop you notice two things. First, is the smell of cigars from the moment you enter the shop to the second you leave the building. The second thing you'll notice is the wide variety of pipes, pipe tobacco, cigars, and cigar accessories. Though this is a problem if you are a novice or a beginner because it is easy to be overwhelmed by the huge variety of pipes.
But this lack of organization, isn't so worry some if you have some experience under your belt with the pipe. Because every pipe smoker knows or should know the difference between a Dunhill and a Peterson.
With that in in mind when your done looking at their pipes you want to to move towards their selection of pipe tobacco. When you take look at their selection of tobacco, and when you do you see that it is HUGE. With every kind of tobacco, from Dunhill, CAO, Peterson, and many more kinds of tobacco that I can't remember their brand name.
Of course when you leave you're doing it, cause you don't want cancer from second hand smoke. Which permeate the entire store and your clothes. Not to mention that there is a time limit that everybody has, as to how long of staying in before you need to leave.
As I end this review. I'm glad that I went to this tobacconist, that I got to see their pipes, their HUGE tobacco collection, and even their cigar collection was impressive. So if you go to Chicago, make sure you go and take a peak at 19 S Wabash Ave. So yes this may be my new tobacconist when I am in the Windy city…………Or is it?
So with that I'll puff you later.

Monday, January 2, 2012

Saturday, December 31, 2011
Happy New Year
I just want say Happy New Year. I also want to thank you for giving me a thousand hits, and I hope I can give you more reviews and two cents on everything on pipes, pipe tobacco, and everything pipe related.
So with that happy new year and I'll puff you later.
So with that happy new year and I'll puff you later.
Wednesday, December 21, 2011
Christmas Time is almost here.
Hello readers and christmas time is almost here. As a person who's Jewish who doesn't celebrate Christmas, but Yuletide, or the day that Santa gives us presents. I want to wish all of my readers a merry Christmas, a happy Hanukkah, and a happy Kwanzaa for those who still celebrate the holiday.
Also this will be my final post for the year and I hope everybody will celebrate a joyful and merry New Year. But fear not I will not abandon you yet. But I also don't think that any new updates will be posted about pipes, pipe tobacco, and anything pipe related, unless I get a job.
So with that I'll puff you later.
Also this will be my final post for the year and I hope everybody will celebrate a joyful and merry New Year. But fear not I will not abandon you yet. But I also don't think that any new updates will be posted about pipes, pipe tobacco, and anything pipe related, unless I get a job.
So with that I'll puff you later.
Tuesday, December 13, 2011
How To Make your own Pipe Rack Part 5
Warning: If you do not follow the instructions you will lose a finger or a hand. Due to the use of powerful and dangerous tools. Also My blog is not responsible for any lose of limbs due to your own stupidity.
Now that step seven is done we can move on.
 Step 8: Now that we have drilled all eight depressions and the piece that will prop up your pipes. Such as the picture to the right. Now is the time to assemble it all together.
Step 9: You now want to go back to step three and grab that piece of wood as it is going to be the piece that holds up the piece thats hold up your pipes and be a barrier between the two ends. That is half of the width of the base. (See picture right of Step 11 to get a relative picture of things) If you have something different thats fine. I'm not going to yell at you for doing something different.
Step 10: Now this is probably going to be the most difficult part of the assembly. Because you are going to take a table saw, for stability, and cut a grove into the piece that is going be propping up the stems of you pipe, now mind you that this piece is less than a quarter of an inch. So you want to set the blade of your table saw about an eighth of an inch.
Then when you're done with that piece of the wood you want to take the base and do the same thing pretty much. Which is sawing a groove into the base at the same depth. Such as with the picture
Note: Again if you know the exact depth of the groove on the base then that's great and I hope that you will share the knowledge with the rest of the readers.
 Step 11: Now you want to take everything the base, the holder, and the piece of wood that is both divider and proper and put them together. Now that we have some picture at what the finished product will look like, without the glue. Such as the picture to the left.
Then you want to take wood glue and be careful you, because you don't need that much. You want to take the base as you see above. You then pour the glue into the groove, not a lot, but a single line up and down the groove. Just like the picture on the right this god awful paragraph.
 Step 12: Now repeat said process in the groove of piece that will be holding you pipe stems. Now after take all three pieces and combined them you want to cover them in wax paper and clamped them down. Because you don't want the pieces tilting to one side or the other. You want to a block of wood, cover in wax paper to propped up against the barrier and then wait for about 8 hours
Step 13: Now after eight hours, you want remove the clamps, wax paper, and the block of wood and then you want to sand any excess glue that may have seeped out of the grooves when you've combined the three pieces but other than that it should look like pictures below.

 Afterwards you want to start staining, Obviously, you want to put color on the piece. I would recommend a deep reddish color because of one reason, it brings out the grain really nicely. Now all you really need is a rag and some disposable gloves to paint the rack. Because to remove said stain would require mineral water and apparently that isn't all to well fore the skin.
Note: You always, always paint with the grain and quickly because it will dry quite fast, don't worry if you got too much stain in or on one place, again we weren't focusing on appearance.
 Step 14: When you finish staining you will be surprised by how the grain pops. After staining you'll want to wait about half a hour. So when you return, make sure that the stain is dry. After which it should like the picture on the left.
When the rack is dry you want to put three coats of shellac. Now why shellac? Simple, it protects the wood. Like staining you want to go with the grain. When you are done you want to give about thirty minutes with the first coat. When it is done you want to sand any rough spots or unevenness that may have occurred with the shellac.
 Step 15: Now after the first two coats of shellac. Your pipe rack should look like the picture on the right lower right. Now after you are done with sanding any rough spots with the shellac. Using 260 grain sandpaper, you want to use to remove any rough spots. Afterwards you are going to apply the third and final coating of Shellac, which is going to have wax in it. Now this is going to be the longest so………… take the rest of day off.
Step 16: When you are ready to apply the wax
you want to take steel wool and use that to rub the wax onto the wood, make sure you get ever spot with the exception of the bottom. Now your rack will look like you just smeared crisco all over it. But trust me, which is rare, you want to wait about 30 minutes.
When the 30 minutes are up you take a piece of cloth and some elbow grease. Then buff the wax into wood and when you do you'll get a smooth shine and finish.
Step 17: You really don't need this step. All you have to do is cut and glue the felt to the bottom of the base.
And with that you are done, now I know I am missing some dimensions. But I'll post a different post about the dimensions but that will be after Christmas. What do you know I finished the series with twelve days to spare. Now I'm going to post another series of Making Your Own Pipe Rack, and hopefully it doesn't take the ungodly amount of time like, this series.
Thanks for reading and always puff you later.
Now that step seven is done we can move on.
 Step 8: Now that we have drilled all eight depressions and the piece that will prop up your pipes. Such as the picture to the right. Now is the time to assemble it all together.
Step 9: You now want to go back to step three and grab that piece of wood as it is going to be the piece that holds up the piece thats hold up your pipes and be a barrier between the two ends. That is half of the width of the base. (See picture right of Step 11 to get a relative picture of things) If you have something different thats fine. I'm not going to yell at you for doing something different.
 |
| Note: Back on some previous step, probably step seven or six. You saw the base with a line with horizontal lines going through it. Well a friend, who helped me on this project thought it would be best to cut it off and he did the fancy router work you see before you. |
Then when you're done with that piece of the wood you want to take the base and do the same thing pretty much. Which is sawing a groove into the base at the same depth. Such as with the picture
Note: Again if you know the exact depth of the groove on the base then that's great and I hope that you will share the knowledge with the rest of the readers.
 |
| The piece of wood to the far right will be used as divider and proper upper. |
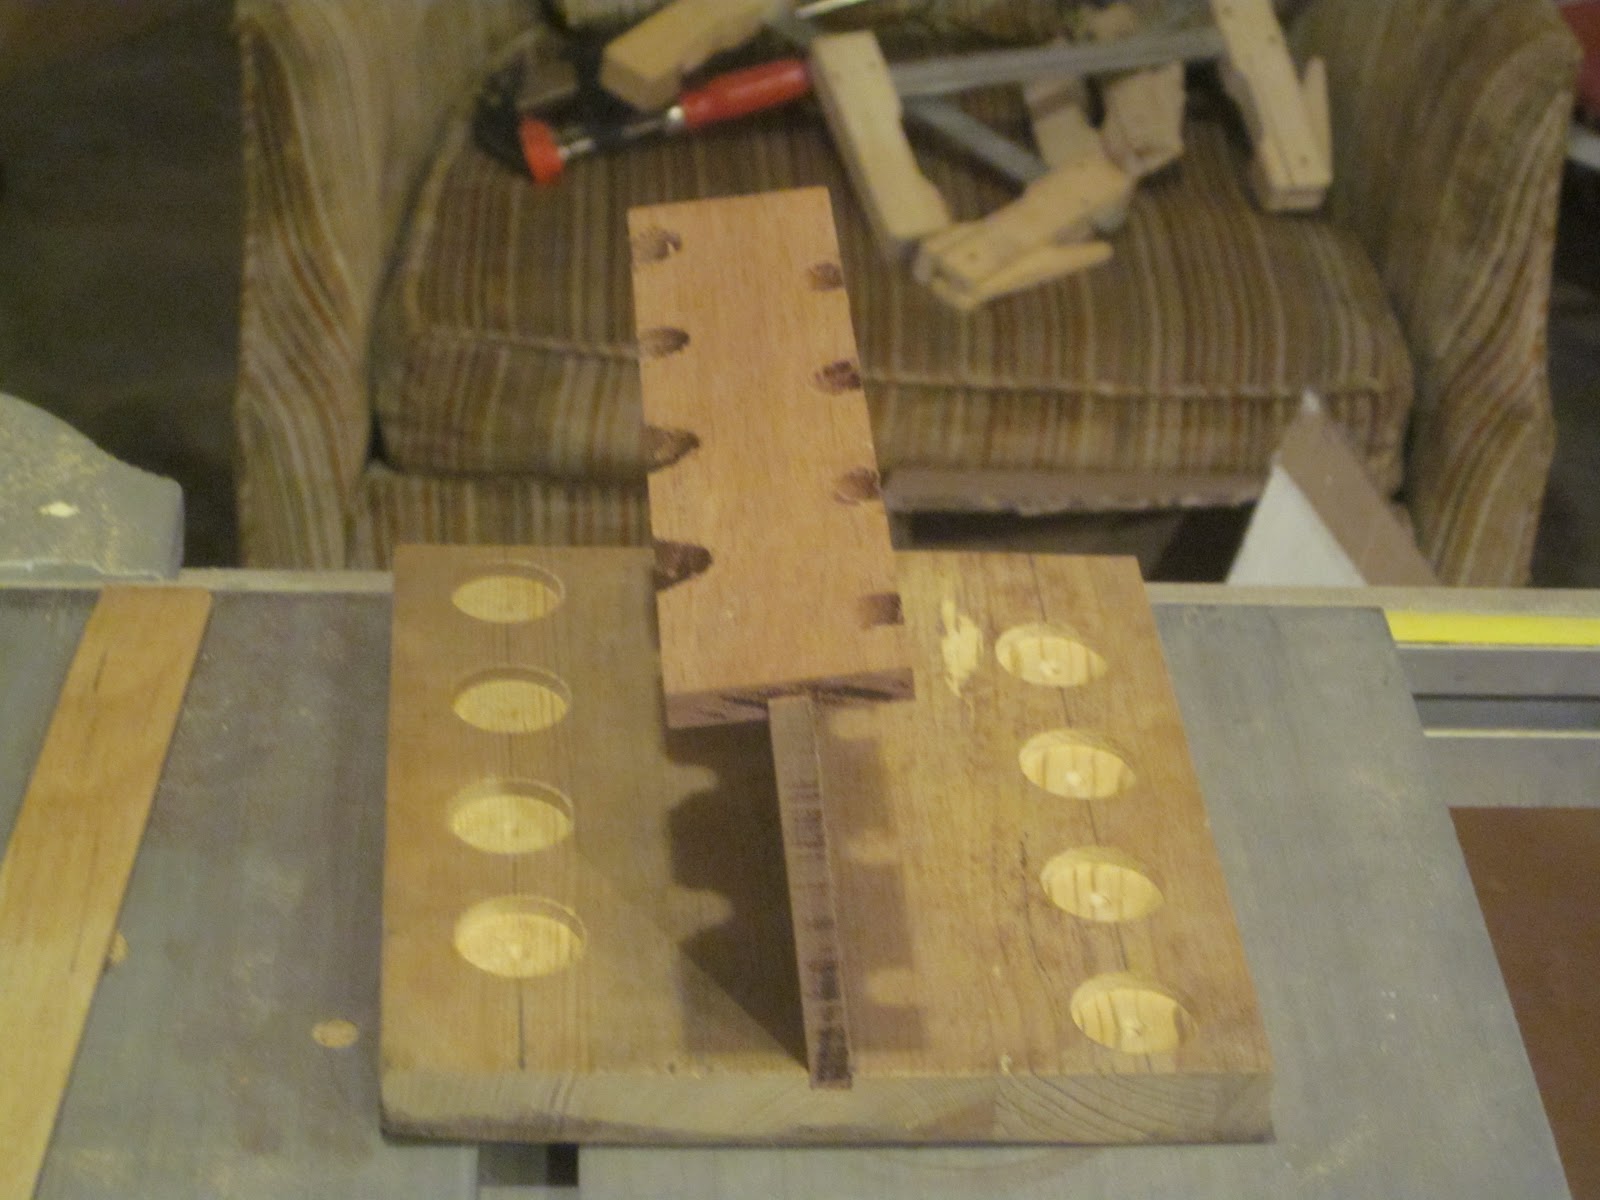 Step 11: Now you want to take everything the base, the holder, and the piece of wood that is both divider and proper and put them together. Now that we have some picture at what the finished product will look like, without the glue. Such as the picture to the left.
Then you want to take wood glue and be careful you, because you don't need that much. You want to take the base as you see above. You then pour the glue into the groove, not a lot, but a single line up and down the groove. Just like the picture on the right this god awful paragraph.

Step 13: Now after eight hours, you want remove the clamps, wax paper, and the block of wood and then you want to sand any excess glue that may have seeped out of the grooves when you've combined the three pieces but other than that it should look like pictures below.


Note: You always, always paint with the grain and quickly because it will dry quite fast, don't worry if you got too much stain in or on one place, again we weren't focusing on appearance.
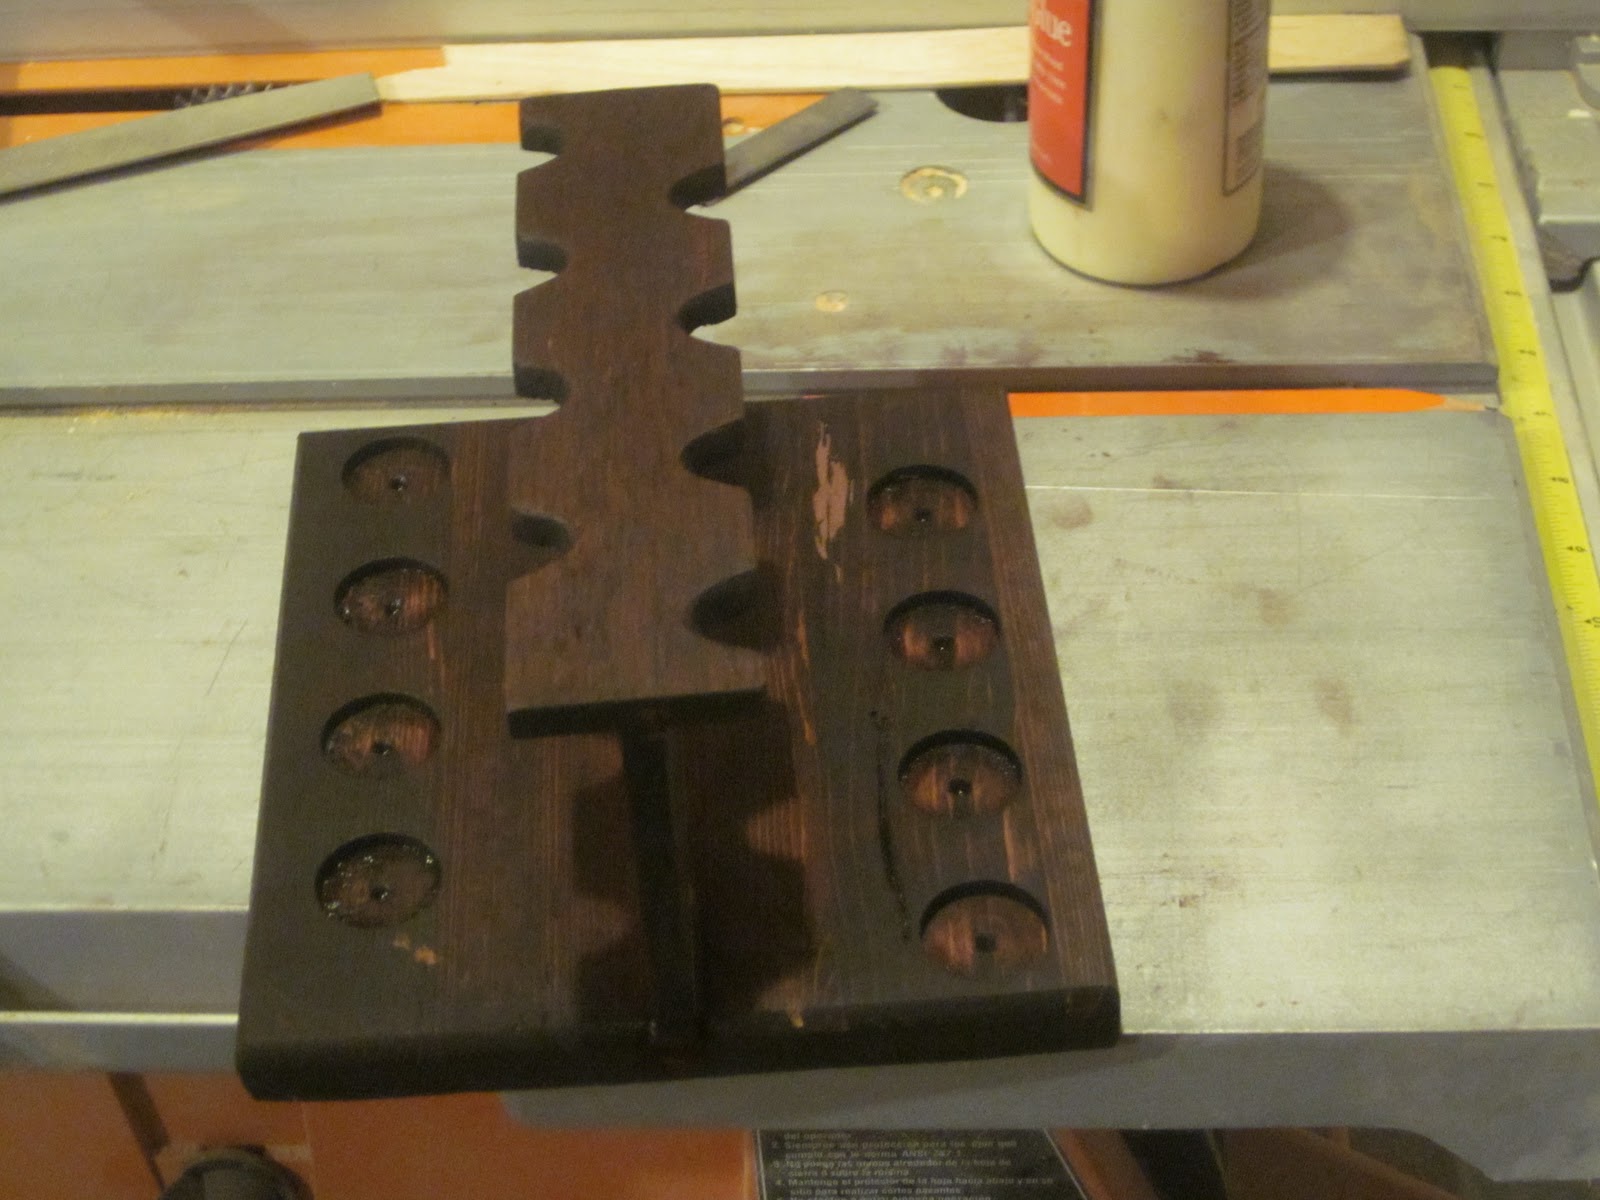
When the rack is dry you want to put three coats of shellac. Now why shellac? Simple, it protects the wood. Like staining you want to go with the grain. When you are done you want to give about thirty minutes with the first coat. When it is done you want to sand any rough spots or unevenness that may have occurred with the shellac.
 Step 15: Now after the first two coats of shellac. Your pipe rack should look like the picture on the right lower right. Now after you are done with sanding any rough spots with the shellac. Using 260 grain sandpaper, you want to use to remove any rough spots. Afterwards you are going to apply the third and final coating of Shellac, which is going to have wax in it. Now this is going to be the longest so………… take the rest of day off.
Step 16: When you are ready to apply the wax
you want to take steel wool and use that to rub the wax onto the wood, make sure you get ever spot with the exception of the bottom. Now your rack will look like you just smeared crisco all over it. But trust me, which is rare, you want to wait about 30 minutes.
When the 30 minutes are up you take a piece of cloth and some elbow grease. Then buff the wax into wood and when you do you'll get a smooth shine and finish.
Step 17: You really don't need this step. All you have to do is cut and glue the felt to the bottom of the base.
And with that you are done, now I know I am missing some dimensions. But I'll post a different post about the dimensions but that will be after Christmas. What do you know I finished the series with twelve days to spare. Now I'm going to post another series of Making Your Own Pipe Rack, and hopefully it doesn't take the ungodly amount of time like, this series.
Thanks for reading and always puff you later.
Wednesday, December 7, 2011
The day that will live in Infamy
Today is the seventieth anniversary when the United States was attacked by the Empire of Japan. Today we is when commemorate to the Sailors, Airmen, and Soldiers who died during the surprise attack in Hawaii. I want the world to know that I am grateful for the survivors and the veterans. Though their deaths will come, and when it does. It will be a sadness that will never be replaced.
But still We should always remember this day and remember the men who died.
But still We should always remember this day and remember the men who died.
Tuesday, November 29, 2011
How to make you own Pipe rack part 4
WARNING: If you do not listen you will lose a limb, finger, or hand. Also me and my blog are not responsible for any lose of limbs or blood lose. So if you lose something or screw up then you and only you are responsible due to your own stupidity.
As I type this and upload photos of the the assembly I want to run a lay down on what you need.
As I type this and upload photos of the the assembly I want to run a lay down on what you need.
- Wood, preferably cedar and or pine due to the easiness and the avability of the lumber.
- Wood glue, much simpler and easier to use and the risk of nailing you hand to the piece is vastly reduced.
- Shellac, sealant against water damage and water stains.
- Sandpaper, just smooth out those rough spots of dried shellac and to smooth the wood before you stain.
- Wood Stain, to color the wood and show prominence of the grain.
- Drill Press, to create the depressions that will help keep the pipes in place. You want the drills bits that one eighths of an inch.
- Wax, To give the finish piece that beautiful shine, and it show's off the grain to perfection.
- A Table Saw or Circular Saw, to cut the wood.
- A Router, to shape and give the wood some decor, but that isn't too important so don't worry.
- Drill bits, ranging from 1/8" to 3/4" to determine the size of both the depressions
- A File, to expand the area where we are propping up the pipes.
- A Clamp, to keep the wood in place.
- A ruler, to make straight lines, despite the fact it is alright to be a gay line. Also you will use this to measure the thickness of the wood.
Okay now we have the materials that we need to make a pipe rack. I want to stress that we are not striving on decor. So if it is ugly as hell but functions as it should, then good, it is a success.
Step 1: You want to take a 4x8 piece of wood, that's an inch thick, and cut in half, from the width. Then take one of the half's and cut it again in half, again from the width, you then take that fourth piece and cut it in half. Then you take one of those eighth pieces or 1x8 and use that as your base for your pipe rack.
Step 2: You then want to take another piece of wood and cut it so that it should be the same length as the base. With the width at least be 1" and a 1/3" thick. Then you want to drill eight holes, four on each side about three centimeters from the edge of the wood and an inch apart. Then you want to use a 3/4" drill bit and marking the wing tips and the center with a pencil. This will designate where you are going to drill. Then you want leave about an inch of space between each
Now you want to drill to the same pattern in picture to conserve space and reduce the risk of destroying your piece.
Now that you have your pattern the same or similar to the pic. You want to take a drill bit somewhat smaller than a 3/4" drill bit and drill a small hole, then take a 3/4" and drill it into the small hole.
Note: You want to drill at a ninety degree angle, because if you don't you'll screw up and have to repeat step 2. Not to mention that the wood will crack and splinter if you drill less than ninety degrees.
Step 3: Next you need to cut a wider piece, with the length of the base. With the width of 1 1/2" to 2". Then you'll want move on to step 4.
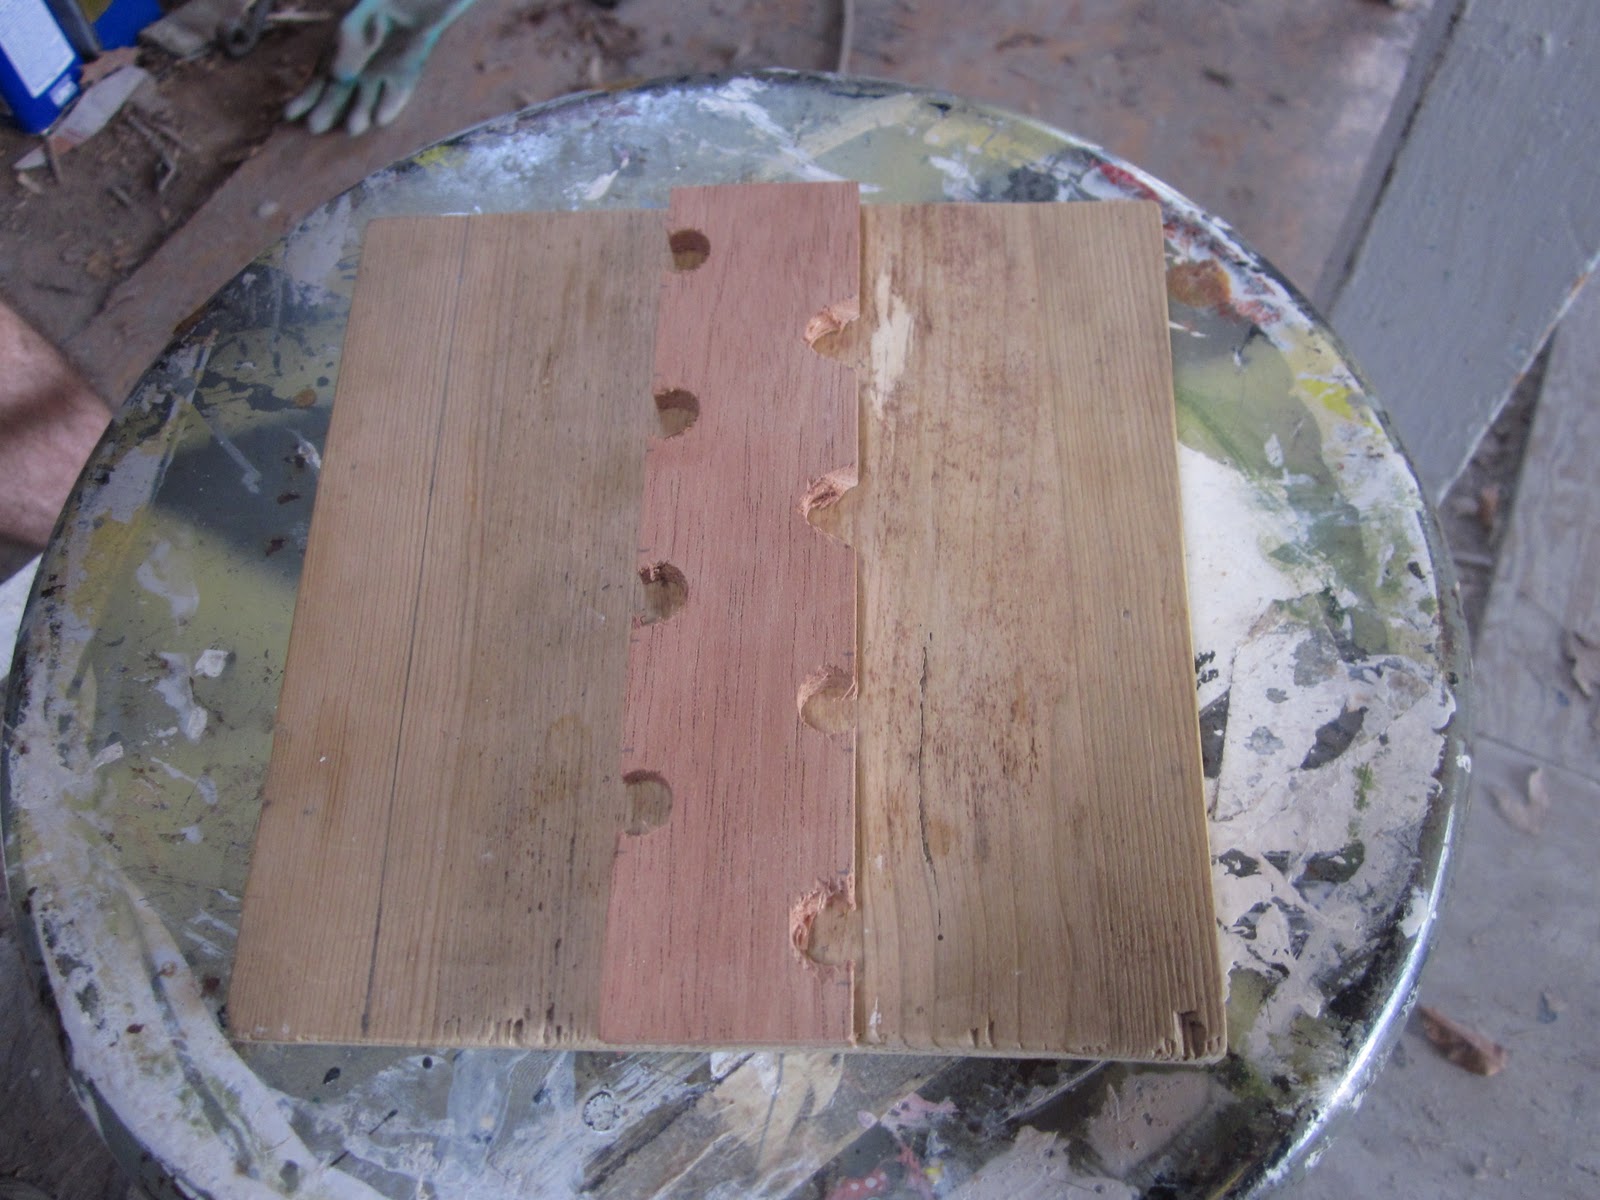
Step 4: Now that Step 2 is done, lets move on. Like the picture on the right, you'll see a line with twelve dots corresponding with the piece of wood. That hold up your pipes. These dots will indicate where you will make your depressions.
Step 5: Now with the lines and circles on the base. You'll want to take the base to a drill press for two reasons:
Reason number 1, much more stable than a drill. Reason number 2, you'll need be drilling at 90º angle or else your going just sending splinters into the air and you'll lose an eye.
Then you want to align the center of the drill with the center dot, without turning the drill on. Only after you have the base and drill aligned you want clamp it, so it won't move when you drill.
After you clamp the wood down, which may be a little difficult. Then you want to the drill about a sixth of an inch, so scoot up there. When you start up the drill, you want to bring it down slowly, because you can screw up with fast speed.
So when you stop for the very first to inspect the aftermath don't be surprised when you see a circle depression with a tiny hole in the middle. Such as the pic in the bottom middle.
Note: I do not know what is the diameter of the drill bit but if I had to guess I would say close to 3/4" of an inch. But if you do know I would appreciate it if you do share the information.
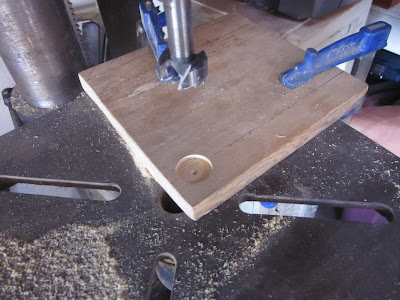 Step 6: Now that you should be about half way done, with drilling the base. If you are you should always be aligning the central dot on the base with the drill or else you start back at step 1. Also always clamp the wood down so you won't risk having the base scoot around the entire drill base.
 Step 7: Now that we're halfway done, drilling depressions into the base. You now want to switch sides and repeat said process. Until you have done the same amount of depressions on the other side. Or until you have something similar in the picture next to this step.
To be Continued………………………
 |
| Just ignore the Meerschaum. But this is the general shape you want the base to be. |
 |
| This is the pattern you want to use due to the space you'll conserve. |
Now you want to drill to the same pattern in picture to conserve space and reduce the risk of destroying your piece.
Now that you have your pattern the same or similar to the pic. You want to take a drill bit somewhat smaller than a 3/4" drill bit and drill a small hole, then take a 3/4" and drill it into the small hole.
Note: You want to drill at a ninety degree angle, because if you don't you'll screw up and have to repeat step 2. Not to mention that the wood will crack and splinter if you drill less than ninety degrees.
Step 3: Next you need to cut a wider piece, with the length of the base. With the width of 1 1/2" to 2". Then you'll want move on to step 4.
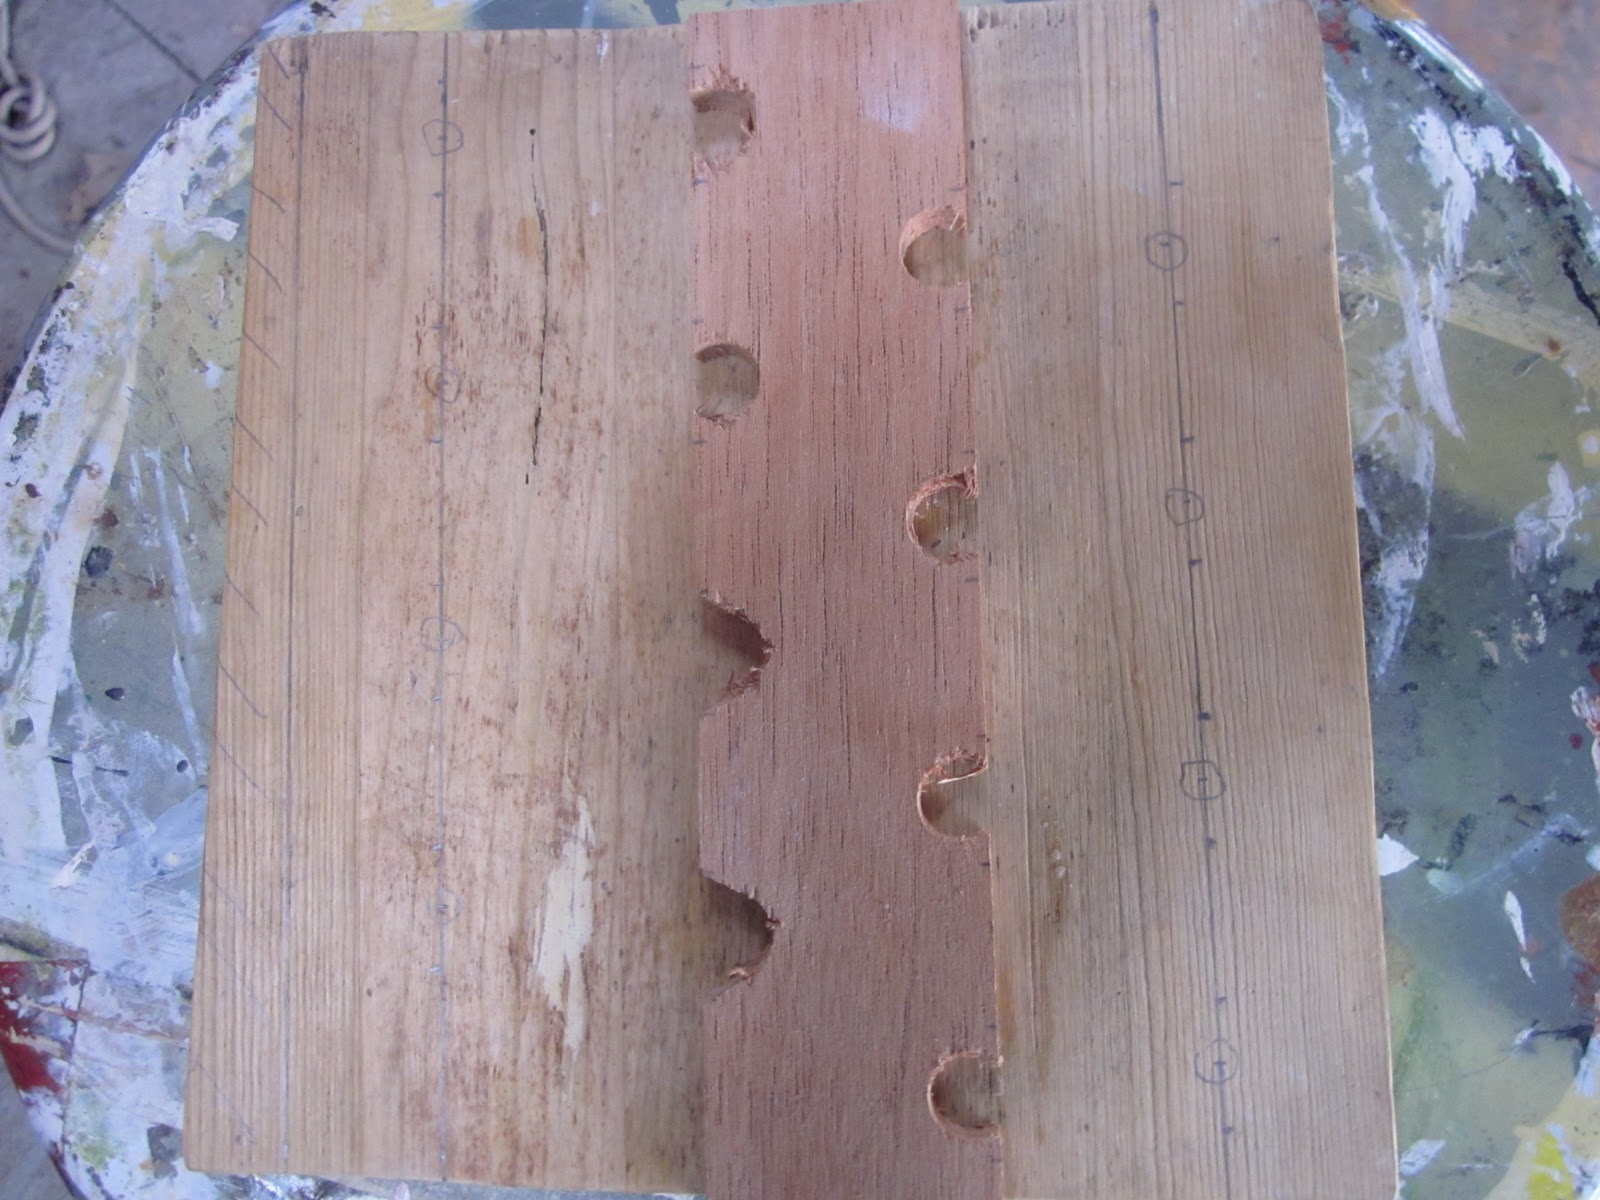 |
| If you see the dots on the line then good. You need to align the dots with the piece of wood that's going prop up your pipes. |
Because we will need a jig. To create the depressions you see in regular pipe racks. I've decided to forgo that path and use a regula
We will just drill into the areas where the dots are. For the sake of common sense you want the depressions to be aligned with the piece that will be holding up the pipe. such as in picture on the left and the one on the bottom.
NOTE: If you see the the third line with stripes, ignore it for the time being it is not important, for now.
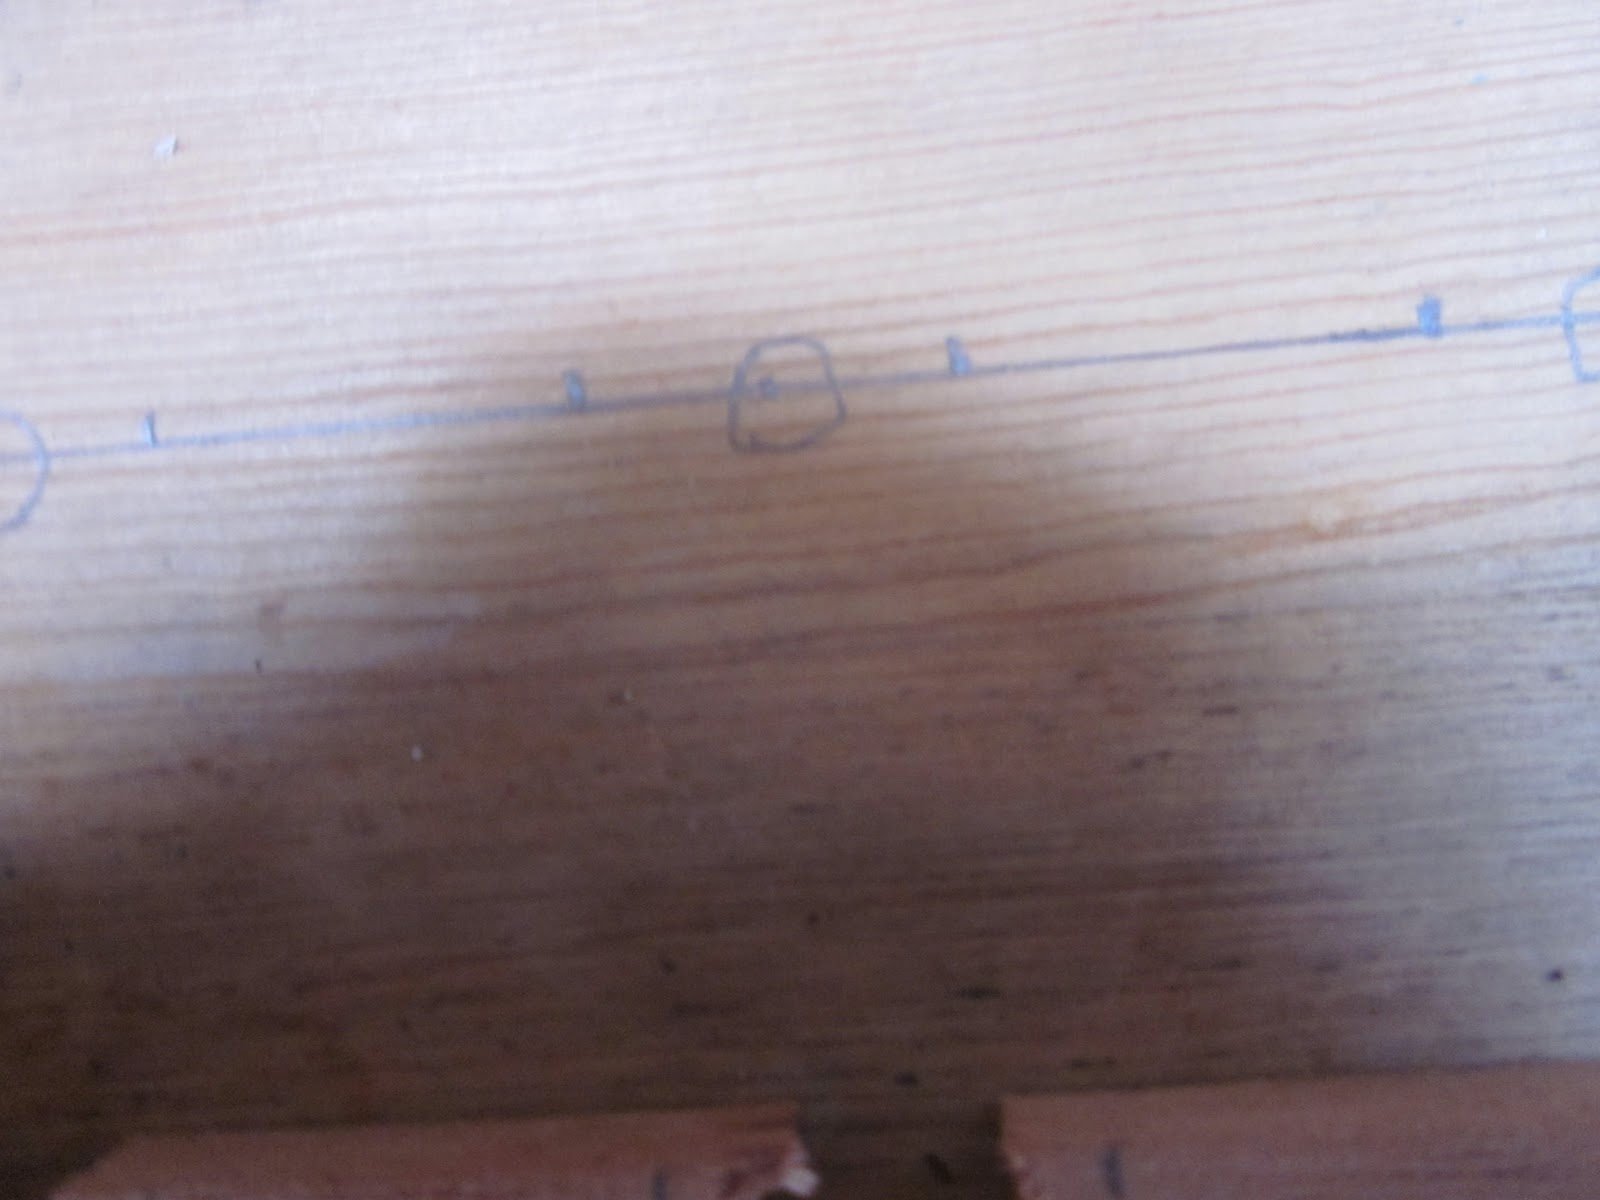 |
| You want to align both the line and dots on the base to the holes where the holes on the piece of wood where you are propping up your pipes. |
Step 5: Now with the lines and circles on the base. You'll want to take the base to a drill press for two reasons:
Reason number 1, much more stable than a drill. Reason number 2, you'll need be drilling at 90º angle or else your going just sending splinters into the air and you'll lose an eye.
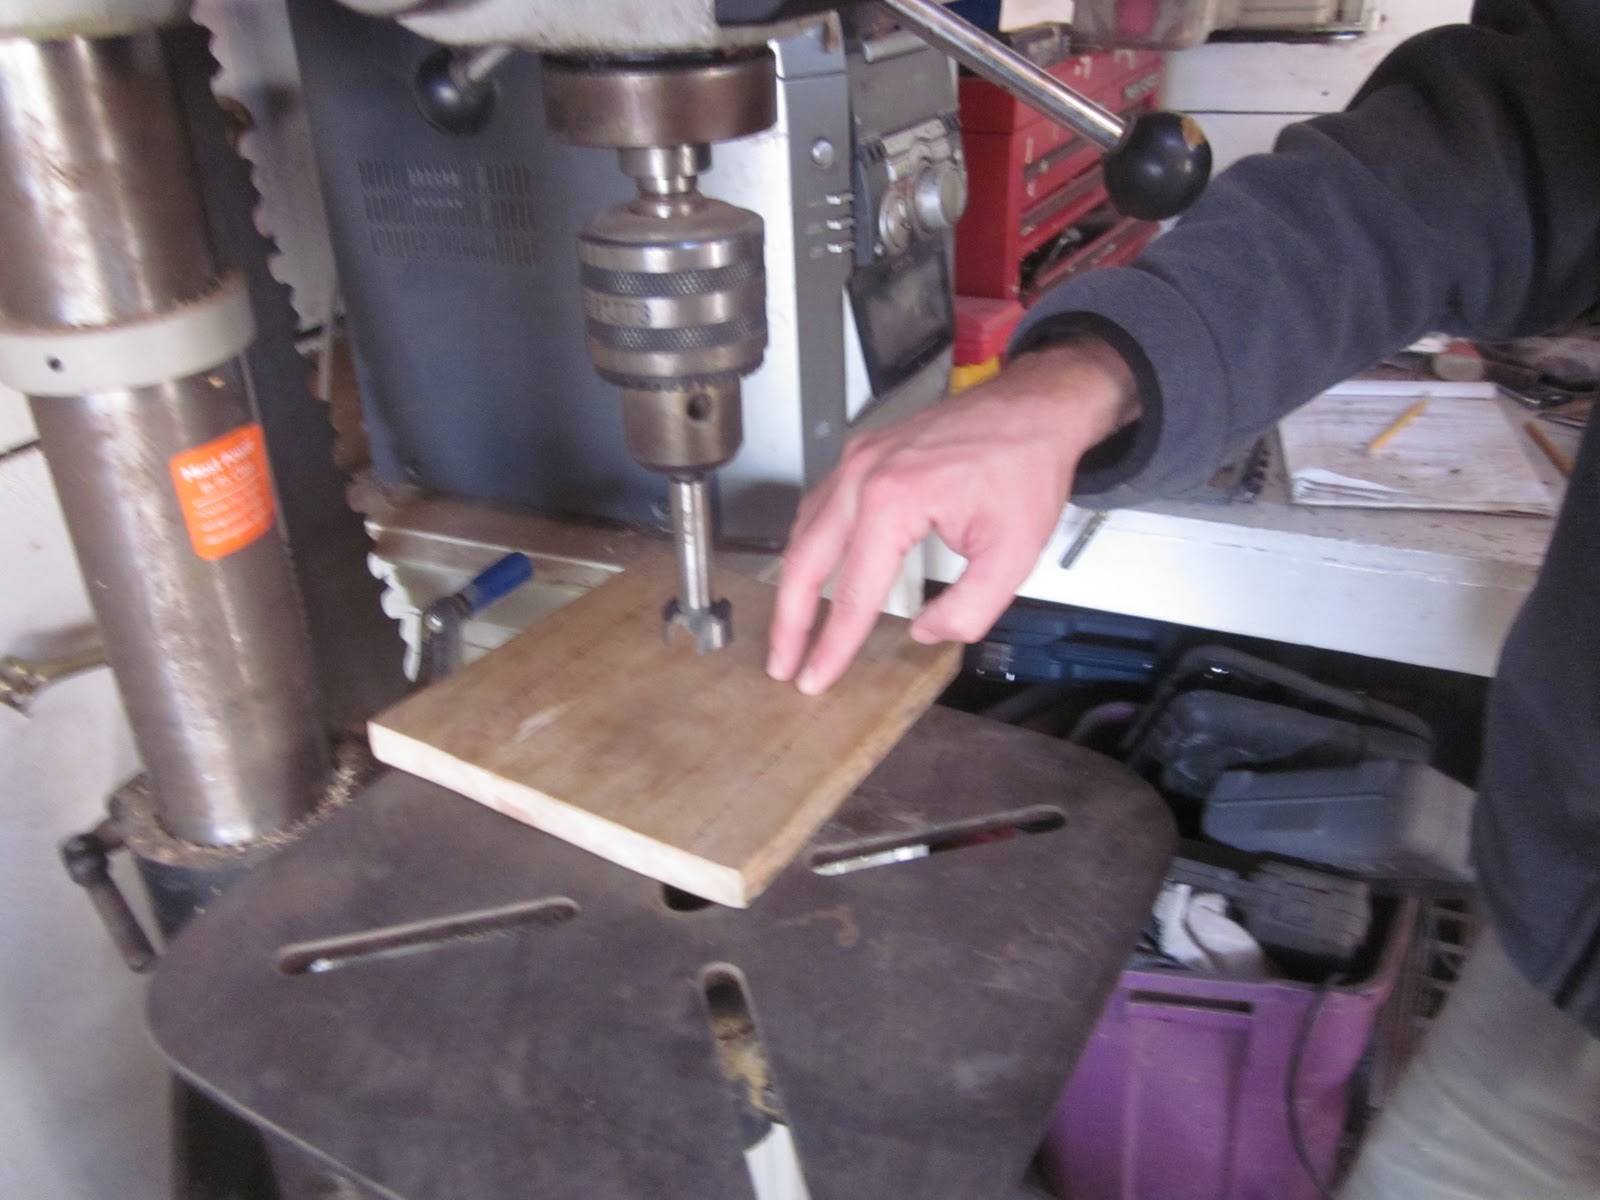 |
| If you know the diameter of the drill bit. Then good, I don't remember. |
Then you want to align the center of the drill with the center dot, without turning the drill on. Only after you have the base and drill aligned you want clamp it, so it won't move when you drill.
After you clamp the wood down, which may be a little difficult. Then you want to the drill about a sixth of an inch, so scoot up there. When you start up the drill, you want to bring it down slowly, because you can screw up with fast speed.
So when you stop for the very first to inspect the aftermath don't be surprised when you see a circle depression with a tiny hole in the middle. Such as the pic in the bottom middle.
Note: I do not know what is the diameter of the drill bit but if I had to guess I would say close to 3/4" of an inch. But if you do know I would appreciate it if you do share the information.


To be Continued………………………
Friday, November 25, 2011
Need an extension on the deadline today.
I'm going to need an extension on the fourth and final posting of How to make your own pipe rack. Due to length and I need to talk to a person about several measurements, just to make sure they're correct. But fret not it will get completed before December 25.
So with that I'll puff you later.
So with that I'll puff you later.
Subscribe to:
Posts (Atom)