
Now that step seven is done we can move on.
 Step 8: Now that we have drilled all eight depressions and the piece that will prop up your pipes. Such as the picture to the right. Now is the time to assemble it all together.
Step 9: You now want to go back to step three and grab that piece of wood as it is going to be the piece that holds up the piece thats hold up your pipes and be a barrier between the two ends. That is half of the width of the base. (See picture right of Step 11 to get a relative picture of things) If you have something different thats fine. I'm not going to yell at you for doing something different.
 |
| Note: Back on some previous step, probably step seven or six. You saw the base with a line with horizontal lines going through it. Well a friend, who helped me on this project thought it would be best to cut it off and he did the fancy router work you see before you. |
Then when you're done with that piece of the wood you want to take the base and do the same thing pretty much. Which is sawing a groove into the base at the same depth. Such as with the picture
Note: Again if you know the exact depth of the groove on the base then that's great and I hope that you will share the knowledge with the rest of the readers.
 |
| The piece of wood to the far right will be used as divider and proper upper. |
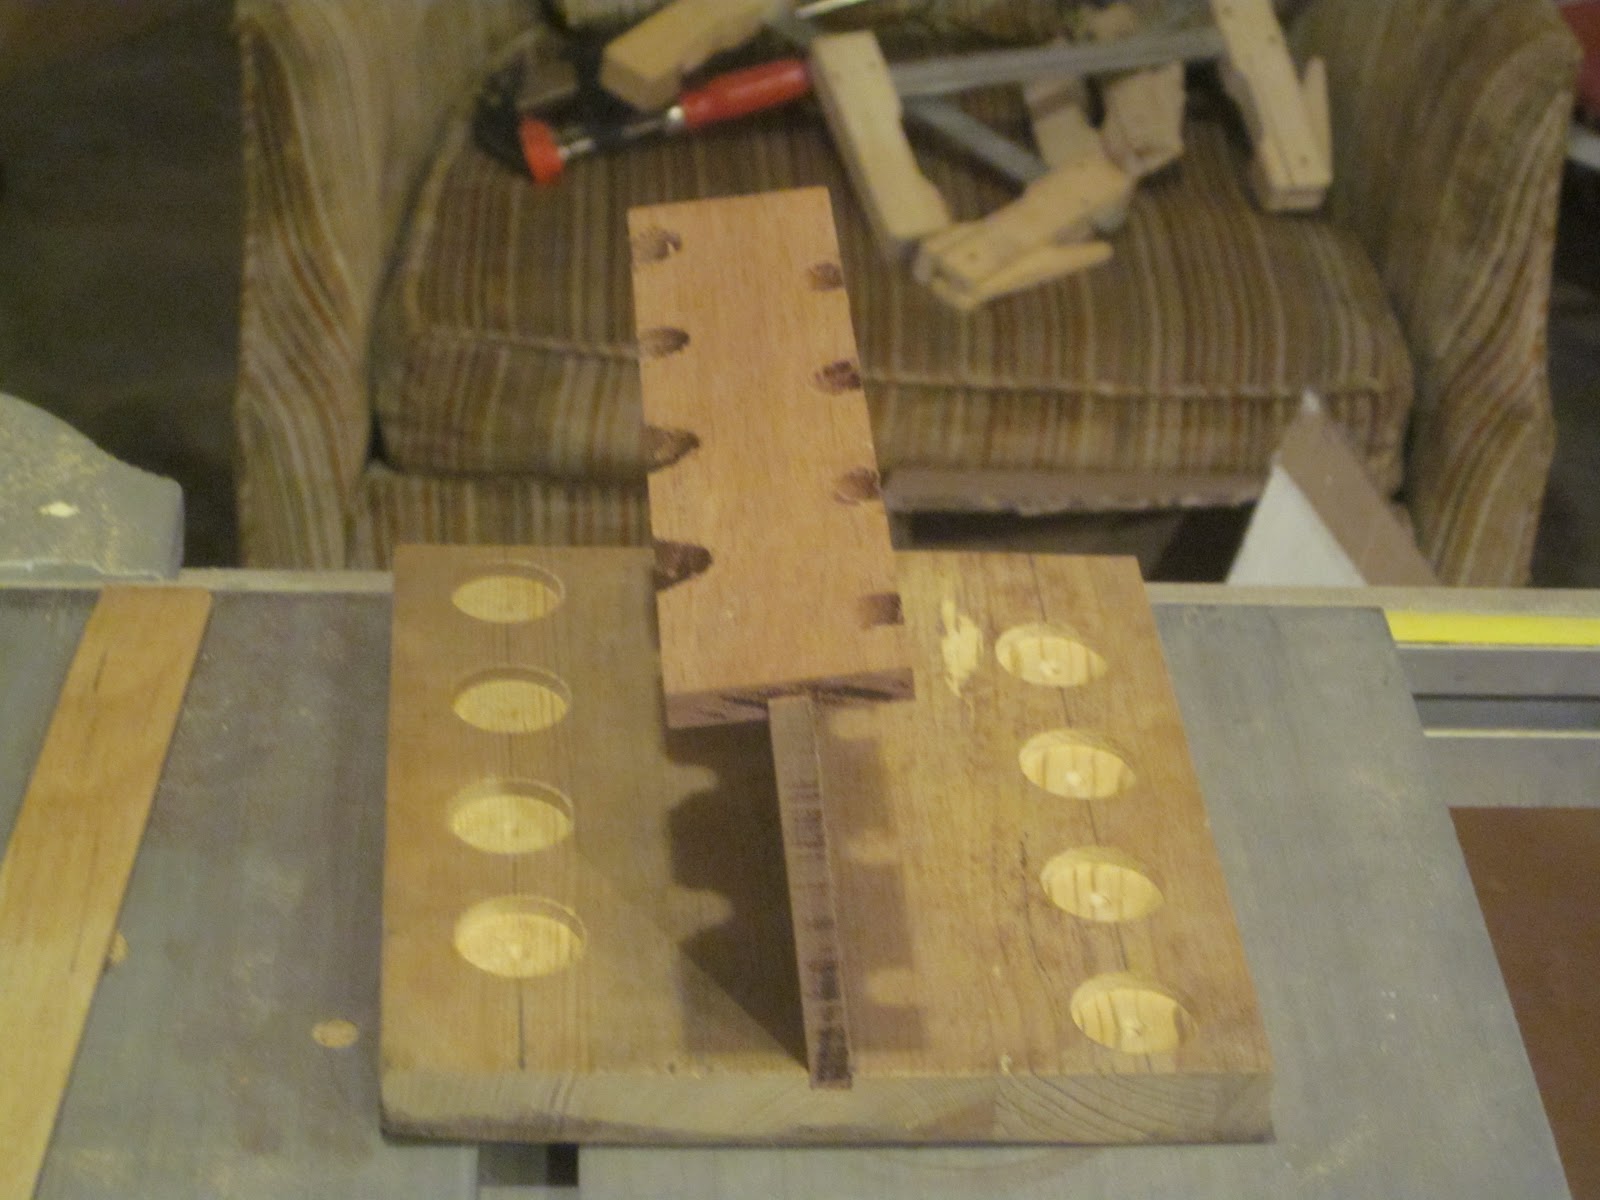 Step 11: Now you want to take everything the base, the holder, and the piece of wood that is both divider and proper and put them together. Now that we have some picture at what the finished product will look like, without the glue. Such as the picture to the left.
Then you want to take wood glue and be careful you, because you don't need that much. You want to take the base as you see above. You then pour the glue into the groove, not a lot, but a single line up and down the groove. Just like the picture on the right this god awful paragraph.

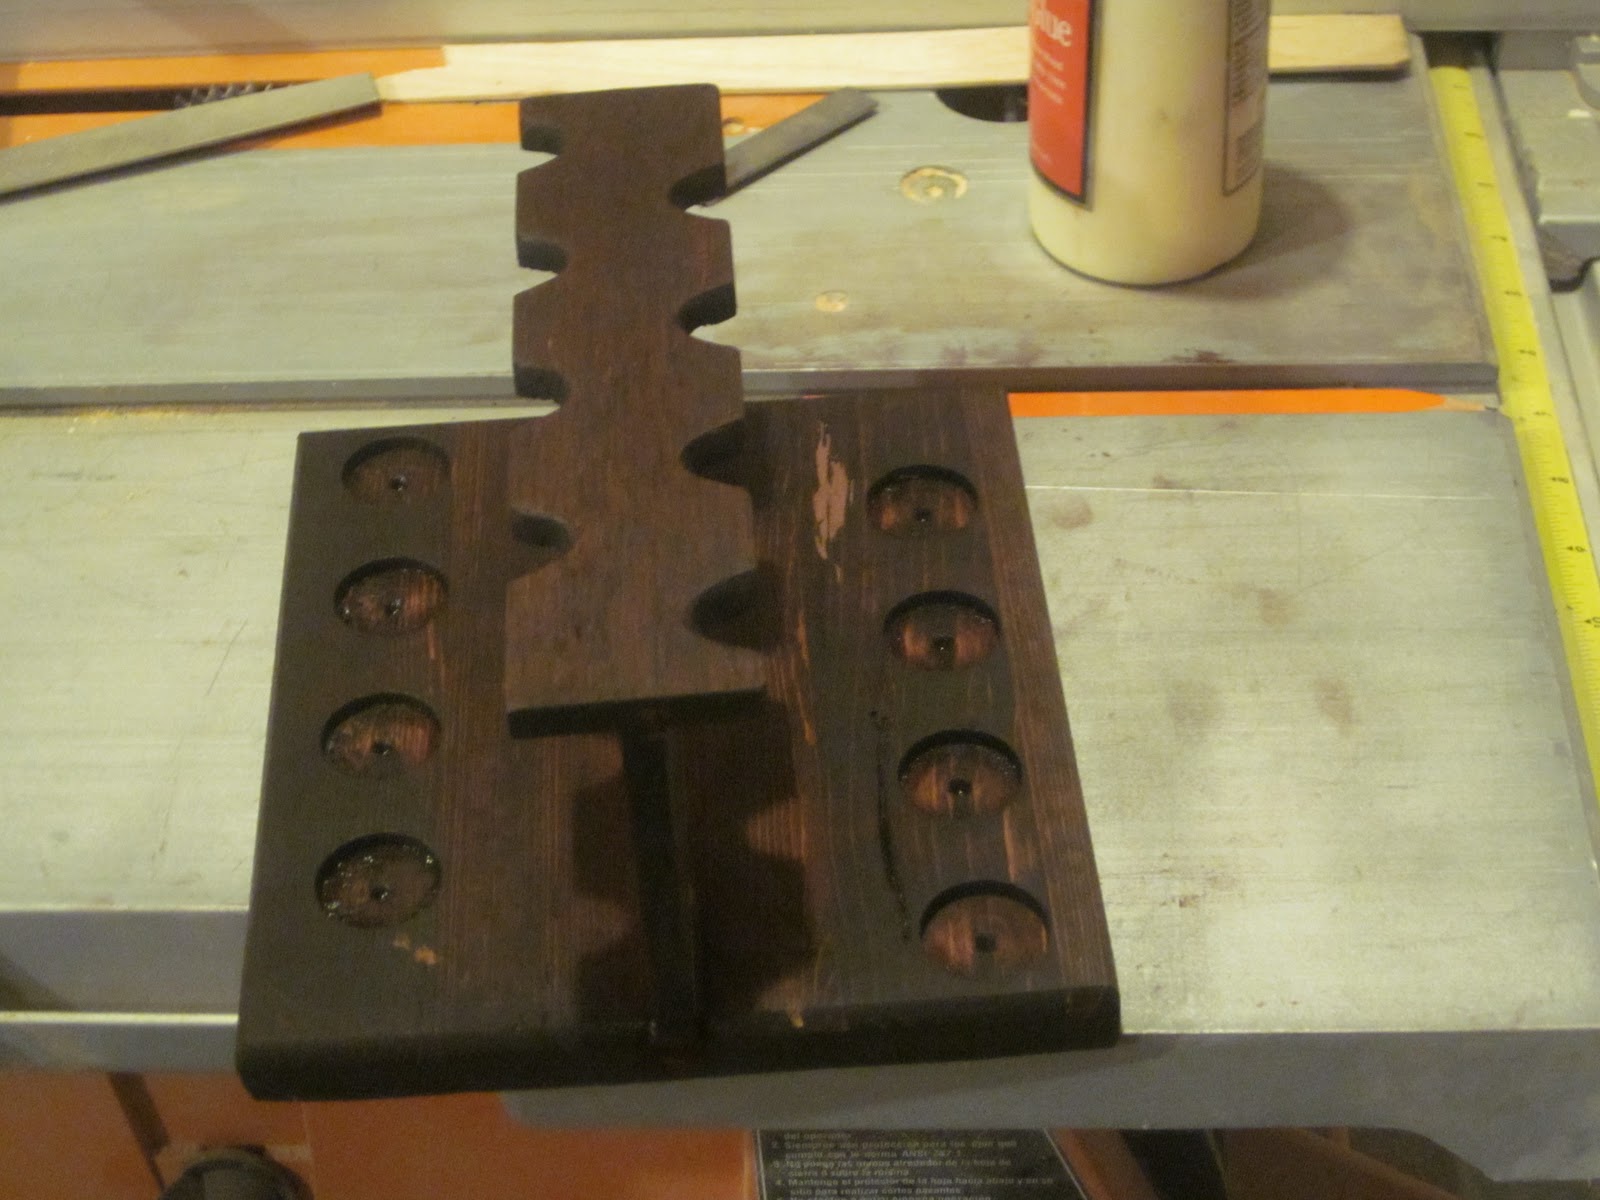
Step 13: Now after eight hours, you want remove the clamps, wax paper, and the block of wood and then you want to sand any excess glue that may have seeped out of the grooves when you've combined the three pieces but other than that it should look like pictures below.


Note: You always, always paint with the grain and quickly because it will dry quite fast, don't worry if you got too much stain in or on one place, again we weren't focusing on appearance.
When the rack is dry you want to put three coats of shellac. Now why shellac? Simple, it protects the wood. Like staining you want to go with the grain. When you are done you want to give about thirty minutes with the first coat. When it is done you want to sand any rough spots or unevenness that may have occurred with the shellac.
 Step 15: Now after the first two coats of shellac. Your pipe rack should look like the picture on the right lower right. Now after you are done with sanding any rough spots with the shellac. Using 260 grain sandpaper, you want to use to remove any rough spots. Afterwards you are going to apply the third and final coating of Shellac, which is going to have wax in it. Now this is going to be the longest so………… take the rest of day off.
Step 16: When you are ready to apply the wax
you want to take steel wool and use that to rub the wax onto the wood, make sure you get ever spot with the exception of the bottom. Now your rack will look like you just smeared crisco all over it. But trust me, which is rare, you want to wait about 30 minutes.
When the 30 minutes are up you take a piece of cloth and some elbow grease. Then buff the wax into wood and when you do you'll get a smooth shine and finish.
Step 17: You really don't need this step. All you have to do is cut and glue the felt to the bottom of the base.
And with that you are done, now I know I am missing some dimensions. But I'll post a different post about the dimensions but that will be after Christmas. What do you know I finished the series with twelve days to spare. Now I'm going to post another series of Making Your Own Pipe Rack, and hopefully it doesn't take the ungodly amount of time like, this series.
Thanks for reading and always puff you later.
Good job, thanks for this post.
ReplyDeleteThis comment has been removed by a blog administrator.
ReplyDelete